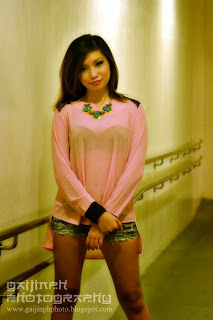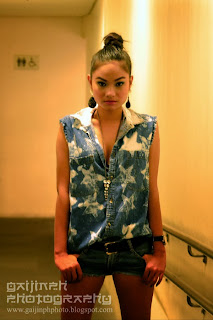
I joined a fashion photo shoot some time ago. I was not content with my shots (I blame my technique) , but my pics did remind me of those fashion sheets from the 90's.
Looking it up from the Photography masters in the net, they have bestowed upon me a solution...BEHOLD THE POWER OF HIGH PASS AND GAUSSIAN BLUR!!!!!.
The first step is to do your usual stuff on the photo. Do your color corrections, brightness, saturation, something, something, something....
Then in Photoshop, duplicate the finished picture and set that layer as "Overlay". Not setting the duplicate layer from "Normal" to :Overlay" will create a very dark messy....mess.

While the duplicate overlay layer is active for editing, select "Filter" - "Others..." - "High Pass". Increase the value high enough until the blemishes and other skin imperfections fade away. For large scale close-ups, you might want to put it more than halfway through, max. Too much would create a unsightly "aural glow" in the end product, which reminds me of those broken photos from the 1920's.
If you are satisfied with the High Pass levels, then go back to the menu bar and select "Filter" - "Blur" - "Gaussian Blur". Gently raise the variable until the harsh, rough, rugged color and tones mellow away like a mist. Too much will make the whole process useless...as there are no more wispy aura to see... too little and you will se more dark tones than light wispy mists.
----------------------------------
models: Demi Iso
Ana Santos
hair and makeup: Paola Castillo


 I joined a fashion photo shoot some time ago. I was not content with my shots (I blame my technique) , but my pics did remind me of those fashion sheets from the 90's.
 While the duplicate overlay layer is active for editing, select "Filter" - "Others..." - "High Pass". Increase the value high enough until the blemishes and other skin imperfections fade away. For large scale close-ups, you might want to put it more than halfway through, max. Too much would create a unsightly "aural glow" in the end product, which reminds me of those broken photos from the 1920's.